How Do I Set Up A Nextbase 212 Dash Cam?
Ben Wells is a tech enthusiast specializing in cameras and GPS devices. He has a keen interest in reviewing dashcams, navigators, and other useful car...
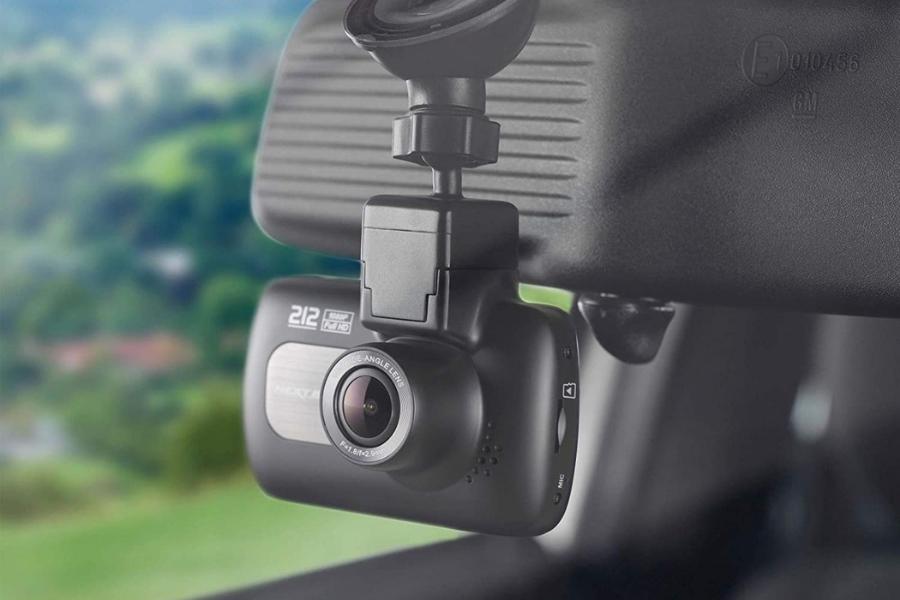
The Nextbase 212 Dash Cam is a budget-friendly option for recording your drives and providing evidence in case of an accident.
This guide, “How to Set Up a Nextbase 212 Dash Cam,” will walk you through the simple steps of installing the camera in your car, including troubleshooting and installing new firmware to prevent potential issues and provide solutions.
Guidelines for Setting Up the Nextbase 212 Dash Cam
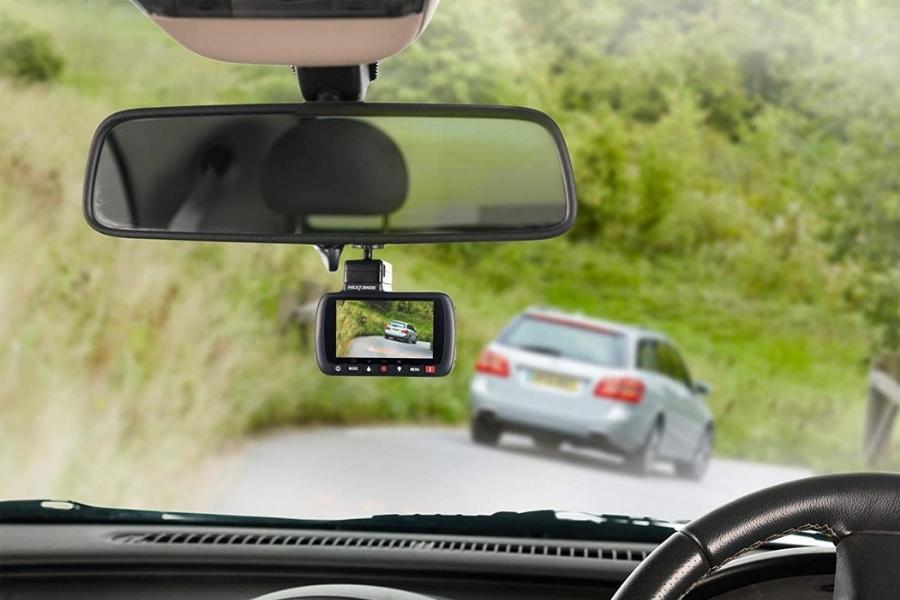
- Unbox the packaging and arrange all components on a desk
- Insert a TF SD card with a capacity of up to 64GB into the Nextbase 212 dash cam
- Remove the adhesive pad from the back of the camera and attach it to the windshield
- Clean the windshield before attaching the camera
- Locate the mounting position and attach the camera to the windshield
- Plug the power cord into the car’s cigarette lighter adapter (12-24VDC outlet) and run the cord to the front of the car
- Attach the other end of the power cord to the back of the camera
- Press the power button on the front of the camera to turn it on
- The camera will automatically start recording when the car starts, indicated by a beep
- Press the power button to stop recording, also indicated by a beep
How To Clear NextBase 212 SD Card?
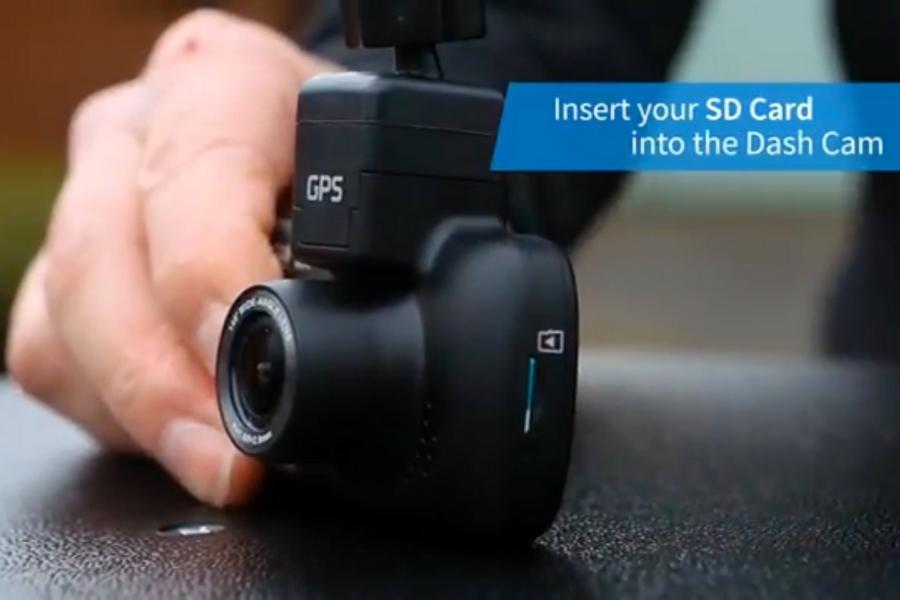
If you’re having trouble clearing your Nextbase 212 SD card, you can use the Dash Cam format option or format it on a Windows computer or Macbook.
There are three methods to delete stored files from your Nextbase dash cam, including protected files, and free up space for new recordings.
Option 1: Format Memory Card On the Dash Cam
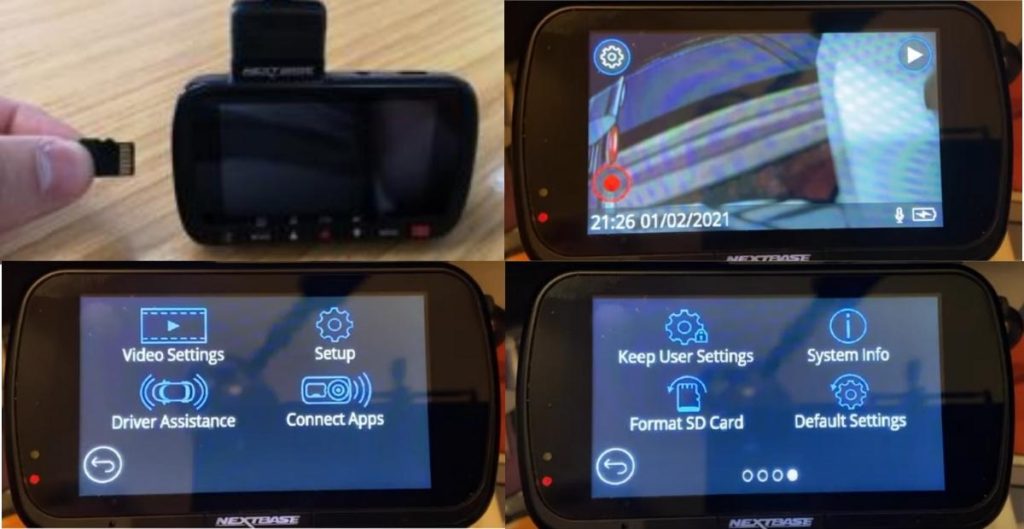
- Navigate to settings by pressing the red circle in the bottom left-hand corner of the screen
- Scroll down to the Setup option
- Choose the option ‘Format’ and follow the instructions
Option 2: Format Nextbase Dash Cam Memory Card On A Windows Computer
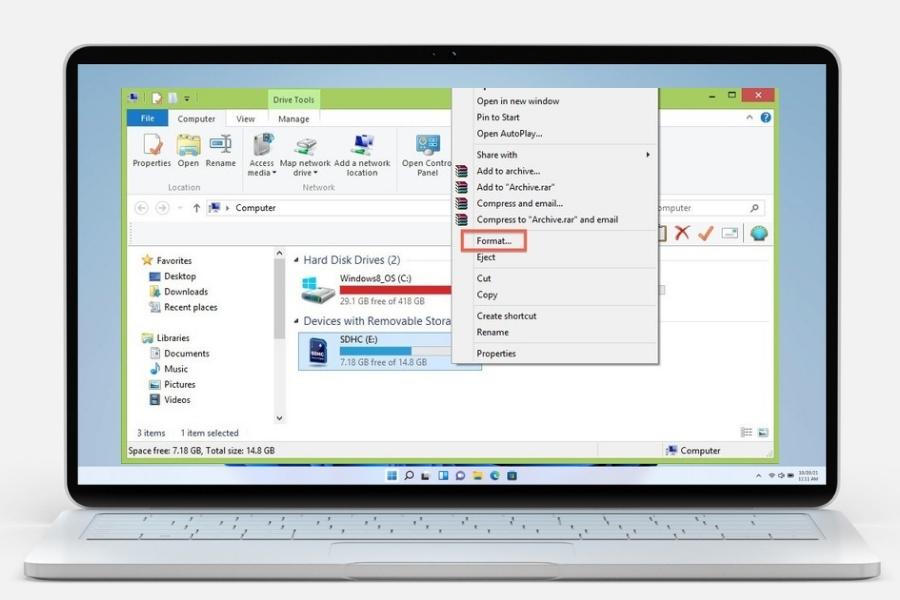
- Insert the card into the computer’s SD card reader or plug it into the SD card port
- Open File Explorer and locate the card
- Right-click on the drive to open the menu and choose the option ‘Format’
- Click on the Start button in the Formatting Removeable Disk panel to complete the format process
- Eject the card from your PC and use it with your dash cam
Option 3: Format the Memory Card On a Mac PC or MacBook
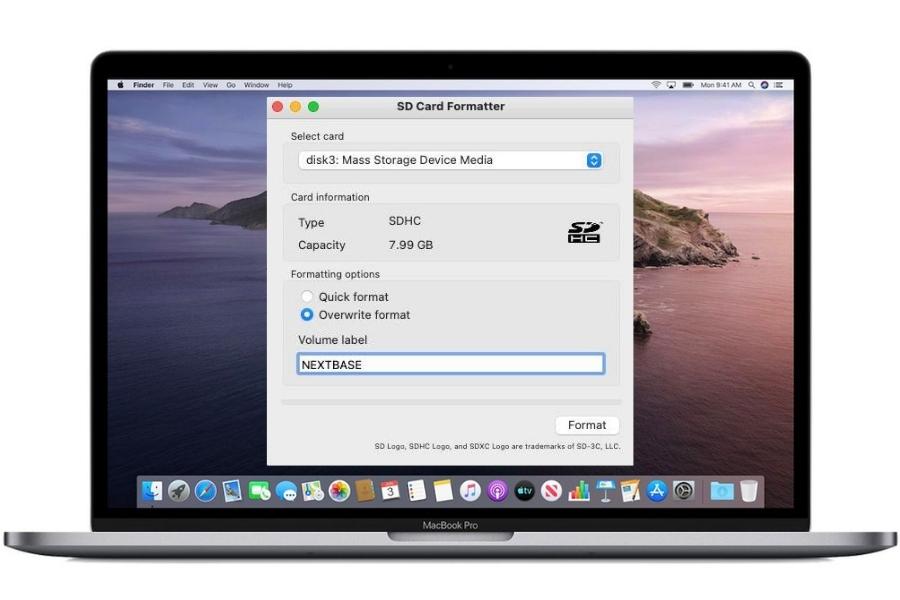
- Connect the SD card to your Mac via the micro SD card reader adapter (dongle)
- Download the SDCardFormatter tool to format your SD card properly on a Mac
How to Nextbase 212 Firmware Update?
Updating the Nextbase 212 Firmware Nextbase has issued several firmware updates to address battery problems, video issues, and other concerns with the Nextbase 212. To install the latest firmware update, follow these steps:
- Check the official Nextbase website for firmware downloads
- Download the most recent Nextbase 212 firmware
- Follow the instructions provided for updating the firmware
Instructions for Updating the Nextbase 212 Firmware
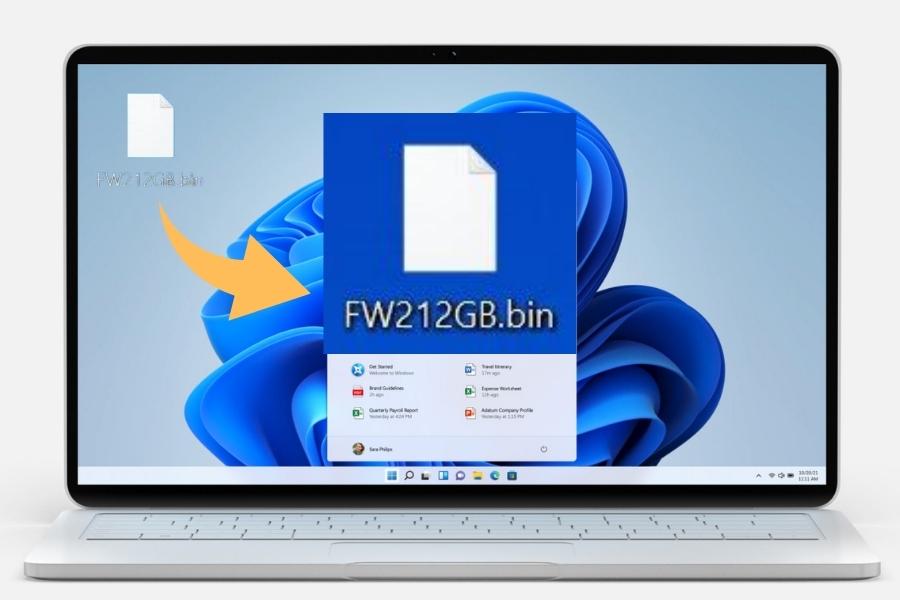
- Obtain the latest Nextbase 212 firmware from the Nextbase website
- The firmware update will be downloaded as a file such as “FW212GB.bin” which should not be renamed
- Place the firmware update file on a microSD card that has been formatted
- Turn on the dash cam and insert the microSD card with the firmware update file
- Connect the dash cam to the computer via the power cable using the provided USB cable
- Once the dash cam boots up, the new firmware update will be installed
- After a few minutes, the dash cam will restart and display the First Time Use Setup menu
- If you did not use the ‘Keep User Settings’ option, you must re-configure the settings after a firmware update
- Verify that the update was successful by pressing the menu button twice to bring up the Setup Menu, then scrolling down to the third screen and selecting ‘System Info’
- This will display all system information, including the firmware version number for reference.
By following these guidelines, you can ensure proper setup and maintenance of your Nextbase 212 Dash Cam, ensuring that it functions properly and records all necessary footage.
Instructions for Resetting the Nextbase 212 Dash Cam:
If you are experiencing technical difficulties with your Nextbase 212 Dash Cam, resetting the device may resolve the issue. Follow the instructions provided below to reset your dash cam.
Steps for Software Resetting the Nextbase 212 Dash Cam
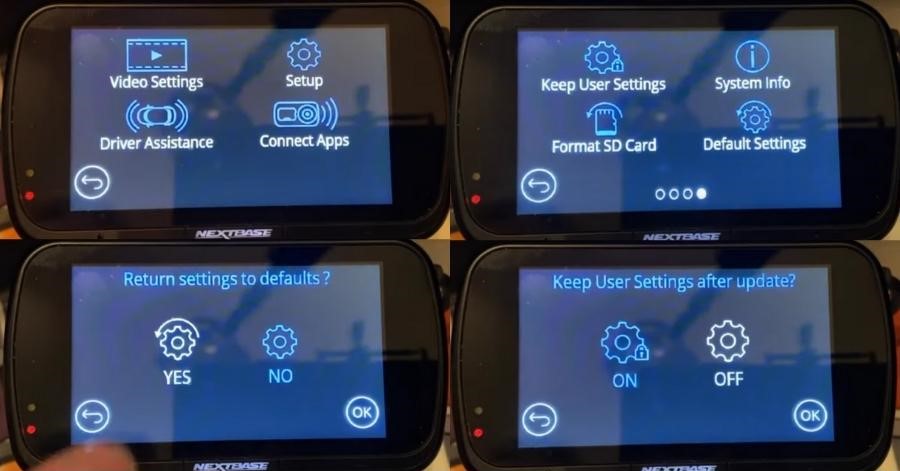
- Connect your dash cam to a power source and turn it on (a computer USB connection is preferable)
- From the recording screen, press the red dot in the bottom left corner to access the settings menu
- Select the Setup option from the menu
- Swipe four fingers to the right until you reach the final page of options
- On the last page, select the ‘Keep User Settings’ option if you want to make your settings permanent, otherwise, skip this step
- Return to the previous page and select “Default Settings”
- Choose ‘Yes’ to return settings to default for your Nextbase 212 dash cam
- The dash cam will restart and be as good as new. Please note that this method applies to all Nextbase 322, 422GW, and 522GW dash cam models.
Nextbase 212 Problems and Solutions
The Nextbase 212 is an affordable dash cam option, but it has been known to have some issues with users since its release. Here are some common problems and solutions to help you troubleshoot and resolve any issues with your Nextbase 212.
Problem 1: Battery Problems
Many users have experienced battery problems with the Nextbase 212, where the camera stops recording suddenly, often without warning.
Solution: The small built-in battery of the Nextbase 212 Dash Cam has a capacity of 470mAh and can only record for approximately 10 minutes before shutting off unless it is connected to a car charger. This is not a problem with the camera itself, but rather a limitation of the internal battery. To avoid this problem, ensure that the camera is connected to a car charger at all times.
Problem 2: Video Quality Issues
Some users have reported problems with the video quality of the Nextbase 212, with images becoming pixelated or distorted.
Solution: The dash cam uses the HD option for video recording, which is 720p by default, and nighttime recording becomes pixelated or distorted when there is no light to capture. To solve this, use a polarized lens and increase the footage quality to FHD (1080p) for more detailed visuals.
Problem 3: Camera Settings Not Working
Some users have reported issues with the camera settings not working or stopping working when overheating.
Solution: The Nextbase 212 is an affordable option in the Nextbase dash cam lineup and is designed to operate in typical temperatures with its built-in battery. However, in extreme temperatures, the camera may stop working because of the limitations of the Li-ion battery, which can expand or malfunction in extreme heat or cold.
To avoid this problem, consider switching to a high-temperature dash cam that uses supercapacitors instead of a battery to withstand high temperatures. This will ensure that the dash cam can continue to operate without interruption, even in extreme environments.
By following these solutions you can resolve any issues that you may be facing with your Nextbase 212 Dash Cam.
- Latest Posts by Ben Wells
-
Best High Temperature Dash Cam
- -
Best Mirror Dash Cam UK
- -
Best Dual Dash Cam under £100
- All Posts

